Saving Your Favorites — From Seed to Shining Seed
This would normally be a topic I would address in September, but maybe due to the long, hot ring of fire summer we are in, several people have asked me about seed saving.
Well, I should say, aren’t asking me, and doing it wrong, and then asking me. The thing about seed saving is, if you harvest too early, the seed may not be viable.
Seed saving is literally as old as the human/plant interactions. Take teosinte, the mother of today’s modern corn. Teosinte doesn’t look at all like today’s modern corn. The plant is multi-stemmed, and the few kernels are rock hard and would fall off readily. So, by the time the gatherers got back to their dwelling, little corn.
So, they started picking ones that had more kernels, less stems, and eventually softer kernels. Their seed saving actually changed the plants over time.
Seed saving today by home gardeners isn’t always about selection to create better varieties, but it does keep a few more dollars in the gardener’s wallet (did you notice how expensive seeds have gotten this year?)
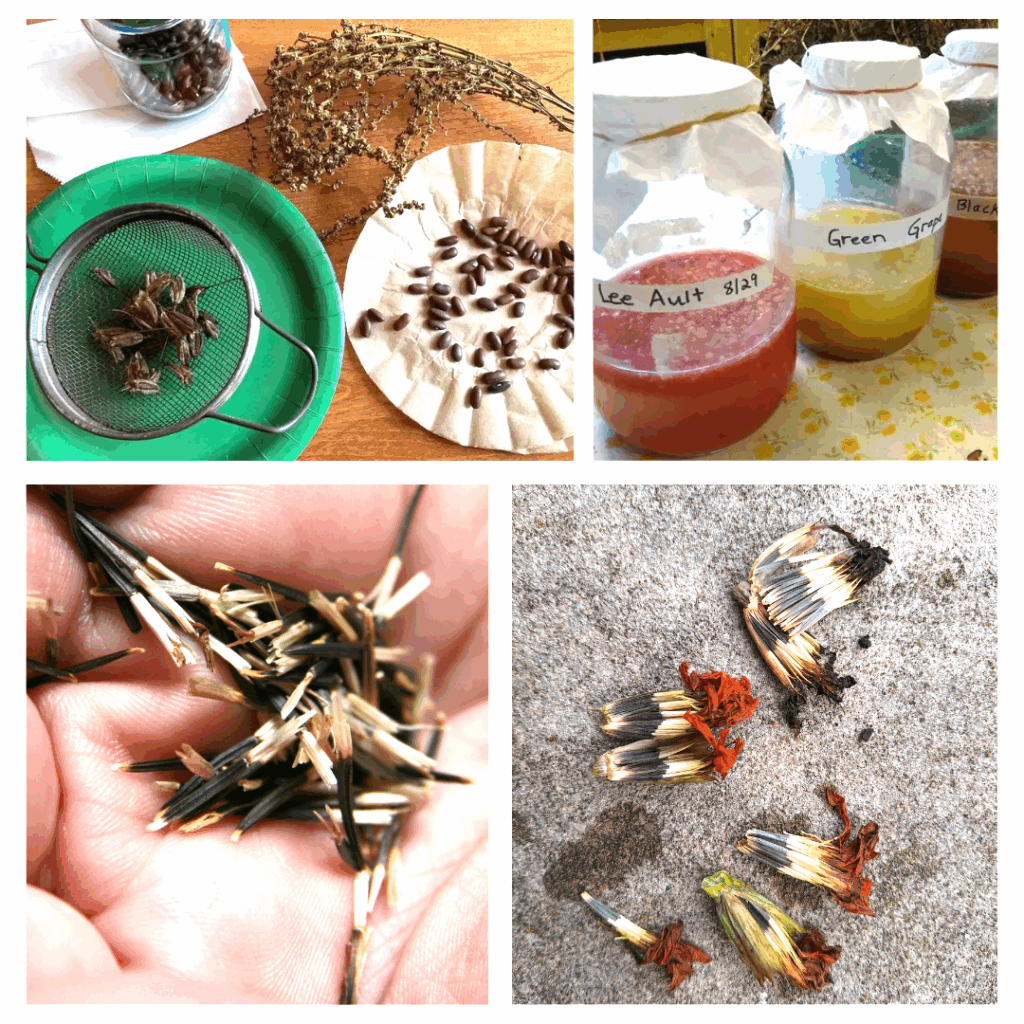
Seed saving also does have several nuances that many people don’t know. Some are related to specific crops, like tomatoes. Did you know that saving tomato seed involves letting a very ripe tomato ferment until it fizzes before saving the seeds?
Other important issues about seed saving are related to the plant itself. Depending on the classification of seed, you may save something you really loved, but when you plant the saved seed next year, you may not get the same results.
You had large yellow marigolds with red accents. Your saved seed may produce a small yellow marigold, one of the parents of the F1 marigold you planted last year.
Do a little research on the plants you are saving seed from. Look for open pollinated or self-pollinated. Don’t save seeds from the cucurbit family (zukes, cukes, melons, gourds) as they cross pollinate with each other and you won’t get what you previously grew.
But let’s start with the basics: Seeds, to be viable for future planting, have to be mature. That doesn’t mean they work hard, have full time jobs, and pay their own bills. But rather, they have to be fully ripened prior to saving. This is the number one mistake seed savers can make. I know it is easy to do.
You want to save those seeds before you get busy with end-of-season activities. But it is worth the wait.
The easiest way to remember how seeds should look before seed saving, just think about what a seed in a seed packet looks like: dry and hard; not soft, or wet. The number one enemy of seed saving, even if you are saving packaged seeds year to year, is moisture.
Moisture is the main condition that gets seeds to germinate. It softens the seed coat, allowing the new plant inside to emerge. That’s why the two critical factors in seed saving are making sure the seed saved is fully mature, and make sure you have a set up to keep that seed dry until planting.
So how do you prevent moisture from ruining your seed saving? Look to your next new pair of shoes, purse, or other purchases. You know that little white bag of what sounds like crystals that says, “Do Not Eat?” That is a valuable tool for seed saving because it is silica gel.
Silica gel is an antidesiccant and will keep items stored with it free from moisture. Dropping a packet of silica gel into saved seeds will assure you that your seeds will remain in optimal condition for next year’s planting. You are also upcycling something that is usually tossed. A double win for nature.
You can also use powdered milk wrapped in a Kleenex as an antidesiccant. Powdered milk will keep your seeds moisture-free for up to six months.
The ideal seed storage environment is between 32 and 41 degrees, and dry. You already have the perfect location — your refrigerator. Refrigerators not only keep our foods cool and a fairly consistent temperature, but they are also excellent dryers. Remember the last time you put some vegetables away in an open bag? The lettuce and celery leaves start to shrivel. It is because the cool, circulating air help to keep things dry.
The way you save individual seed types is extremely variable. Paper wins over plastic because it is porous, so even if there were a little moisture left, it would dry out.
Plastic, sealed containers are great, and many people use old pill bottles to store seed, but if there is any moisture, it can’t escape. I prefer using glass containers with screw top lids.
Choosing which seeds to save is also important. Tomatoes, peppers, peas and beans are good choices in vegetables. Tomatoes have a specific seed-saving trick that helps to prevent plant disease from being transmitted in the seeds.
Take a mature tomato and put it in a jar or bowl with some water. Allow it to get overripe to the point of soupy (somewhat gross) mold. The slurry may even start to ferment. The viable seeds will sink to the bottom of this witches’ brew. Pour off the liquid, and let the seeds dry on something absorbent. I like to use coffee filters, as their material helps to wick moisture away.
Annual/biennial flowers — like sunflowers, calendula, columbine, marigolds, morning glories, nasturtiums, nigella and zinnias — are great choices for seed saving. Native perennials are also easy seed savers. I am not addressing saving seeds for trees and shrubs in this column. I will have more on that later this fall.
Make sure the flowers have fully dried while on the plant. This is the opposite advice of getting your annuals to rebloom. You don’t deadhead spent blossoms, well, at least not all of them. Allow a few to mature fully on the plant before you harvest for seed saving.
Seed saving is a great add on to your gardening year. It is also a great way to keep the tradition of “passalong” plants alive when you share or exchange seeds with others.